Robot Vacuum Brush Replacement

Part1X6.STL
23KB

Part2X6.STL
2KB

Part-Left.STL
664KB

Part-Right.STL
693KB

Auto Vacuum Replacement Brush.3mf
370KB
Robot Vacuum Brush Replacement by RyanDavis is licensed under the
CC-Attribution - Noncommercial - Share AlikeLicense

By downloading, you agree to MakerTouch's Terms of Service and Privacy Policy.
- Description
- Build Instruction
Size: Small (0-5cm)
Don't let worn-out brushes keep your floors from sparkling! 🧹 When your robot vacuum brushes lose their edge, skip the wait for shipping and build your own. 🤖
This modular design allows you to create as many replacement brushes as you need, right from your workshop. By using standard broom bristles, you maintain the same cleaning performance and flexibility as the original factory-made parts. 🌟
• Customizable & Cost-Effective: Why buy expensive packs when you can print the housing and source the bristles yourself? 💰
• Easy Assembly: The model includes dedicated assembly helpers to ensure your bristles are perfectly aligned and securely glued into place. 🧩
• Universal Compatibility: While specifically designed for the BR151, this brush type is standard across many robot vacuum brands. 🔄
Clean your home on your terms with this essential DIY repair solution. 🏠
Printing Tips:
• Fitment Check: Before final assembly, verify that the brush nodes fit securely onto your vacuum and that all printed components snap together properly. 📐
• Tolerance Adjustment: Depending on your specific printer’s calibration, you may need to scale the parts by 1%–2% to achieve the perfect friction fit. 🎛️
• Assembly Prep: Be sure to dry-fit all pieces (excluding the holders) before applying glue to ensure everything is aligned. 🛠️
The maker remixed this product from:
License

Robot Vacuum Brush Replacement by RyanDavis is licensed under the
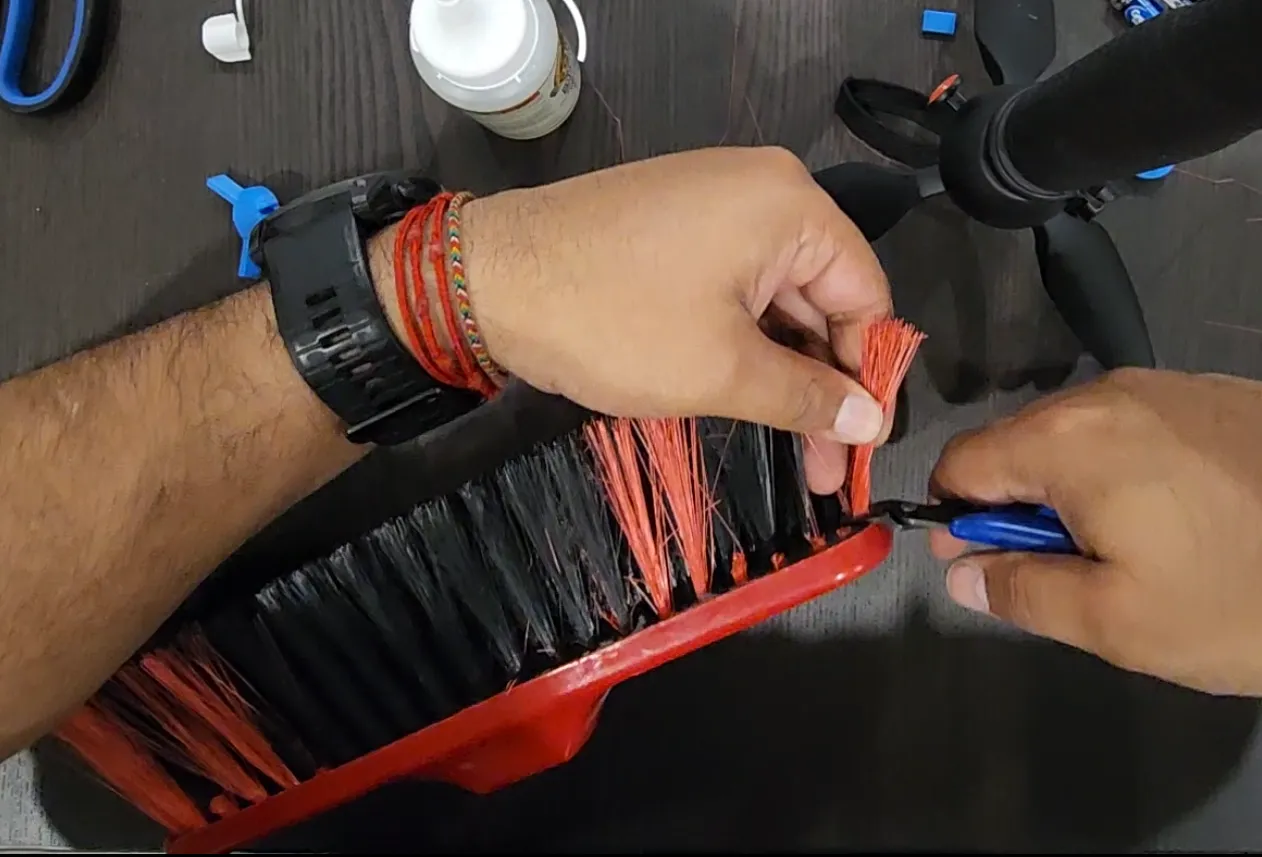
CC-Attribution - Noncommercial - Share AlikeStep 1 - Acquire bristles from a common broom head. Acquire in small batches to prevent waste.
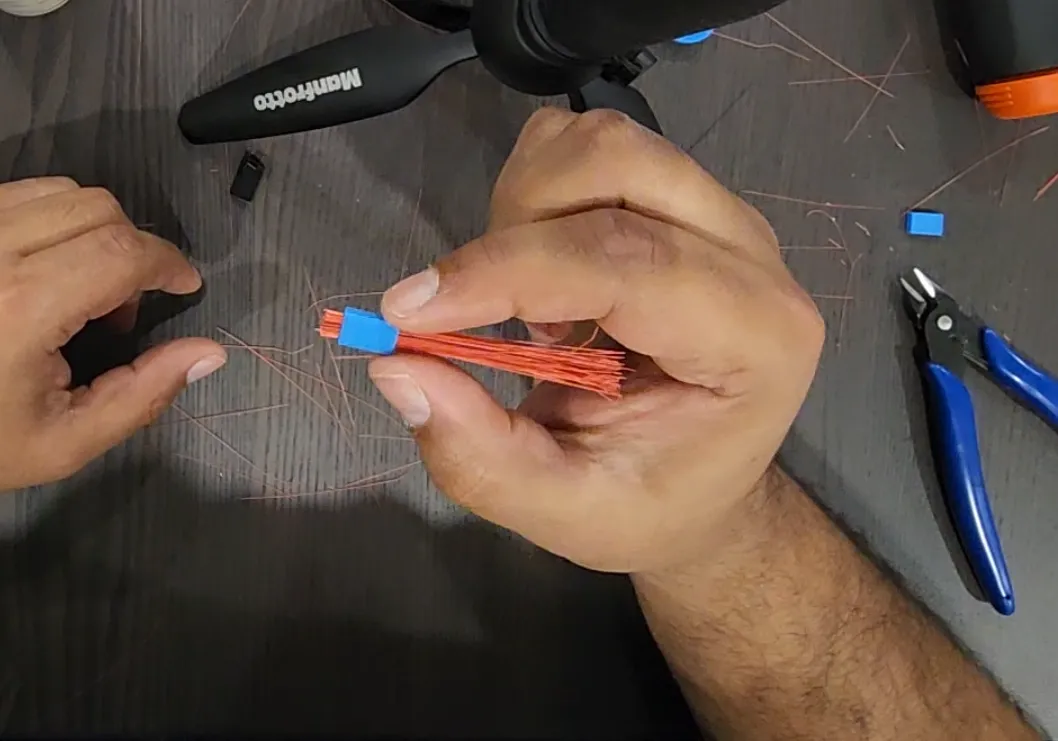
Step 2 - Place bristles into holder to build up an sufficient amount of bristles to add the the vacuum brush replacement. My rule of thumb is that you should have enough that you have some resistance when moving the bristles within the holder.
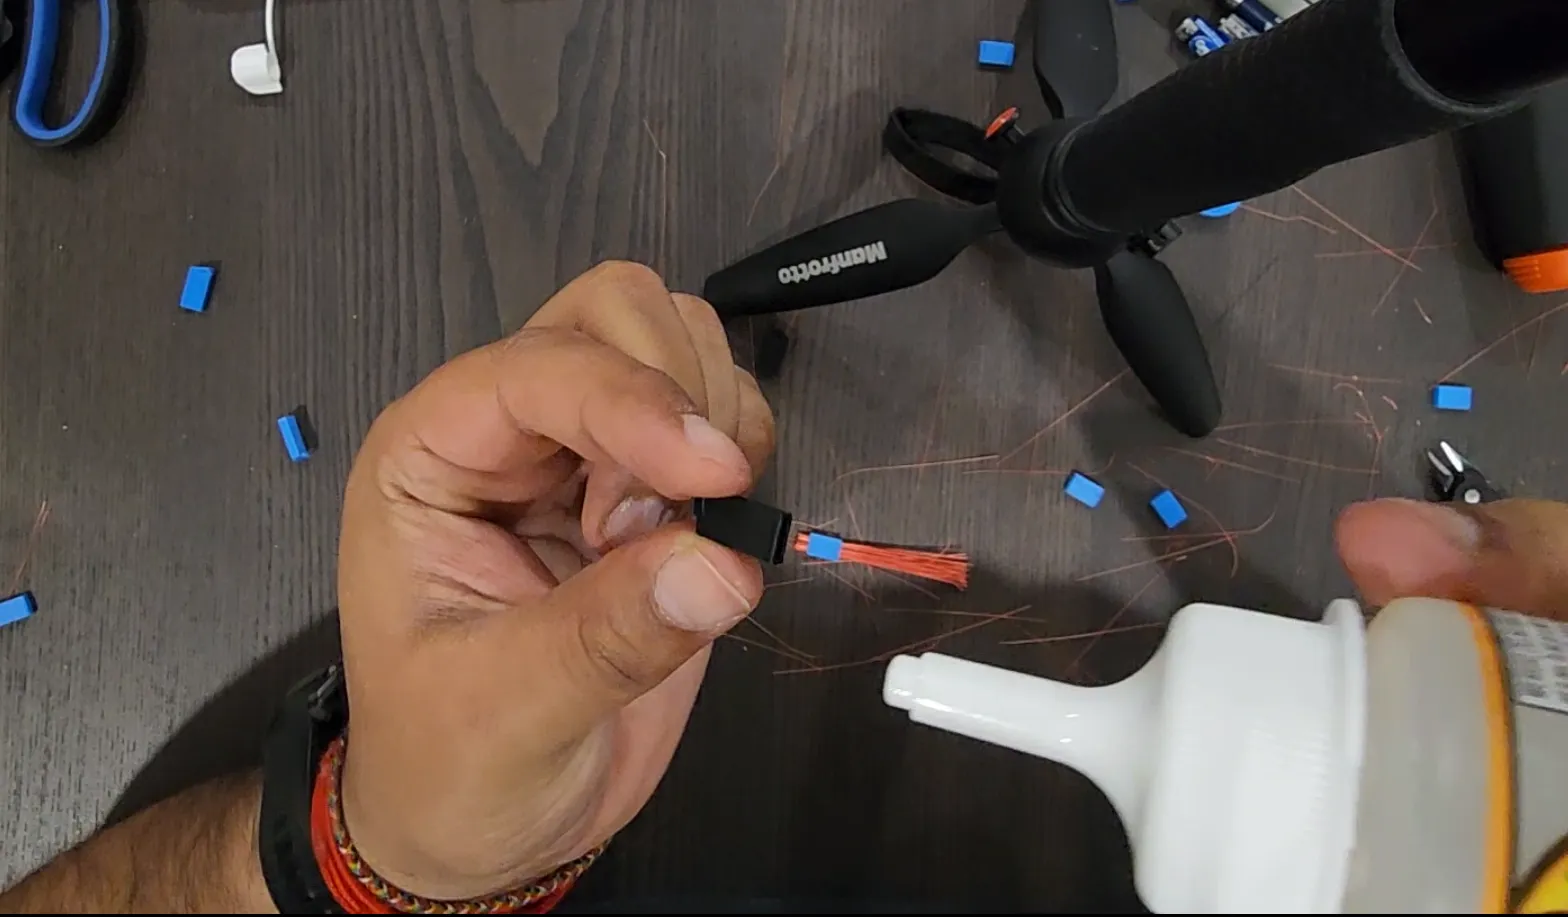
Step 3 - Add glue into brush arm socket, superglue has a decent viscosity to properly coat the bristles inside the arm.
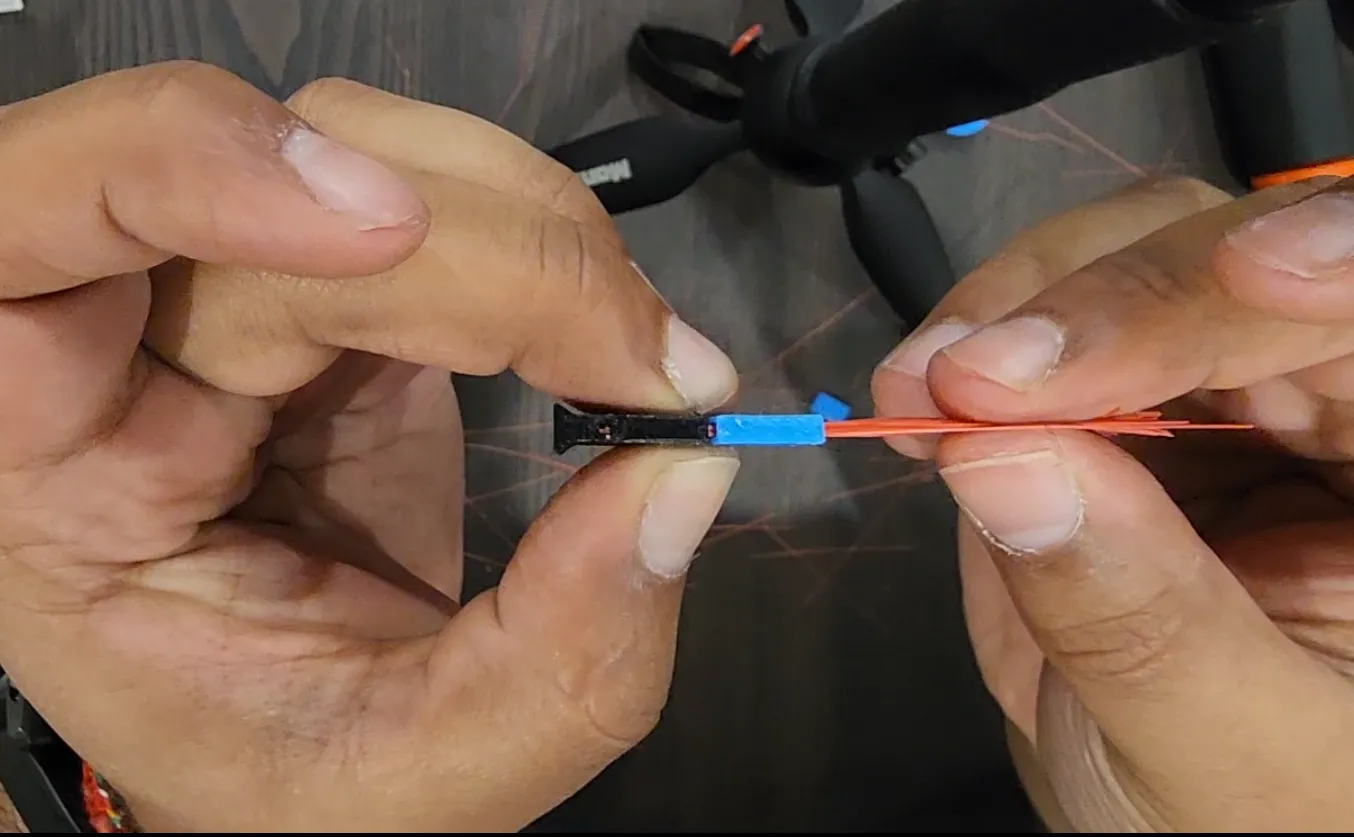
Step 4 - Insert bristles into arm socket filled with glue buy holding both the arm and the holder together, and pushing in the bristles.
Step 5 - If the bristles are sufficiently in the socket, and you're happy with the result, move the holder away from the brush arm, but keep the holder on the bristles to prevent frayed pieces from falling off as it dries. Do this carefully to not accidentally remove the bristles. This is done so you don't accidentally glue the holder to the arm. (Repeat steps 1 through 4 for each arm that you need for your replacements, 3 per brush node)
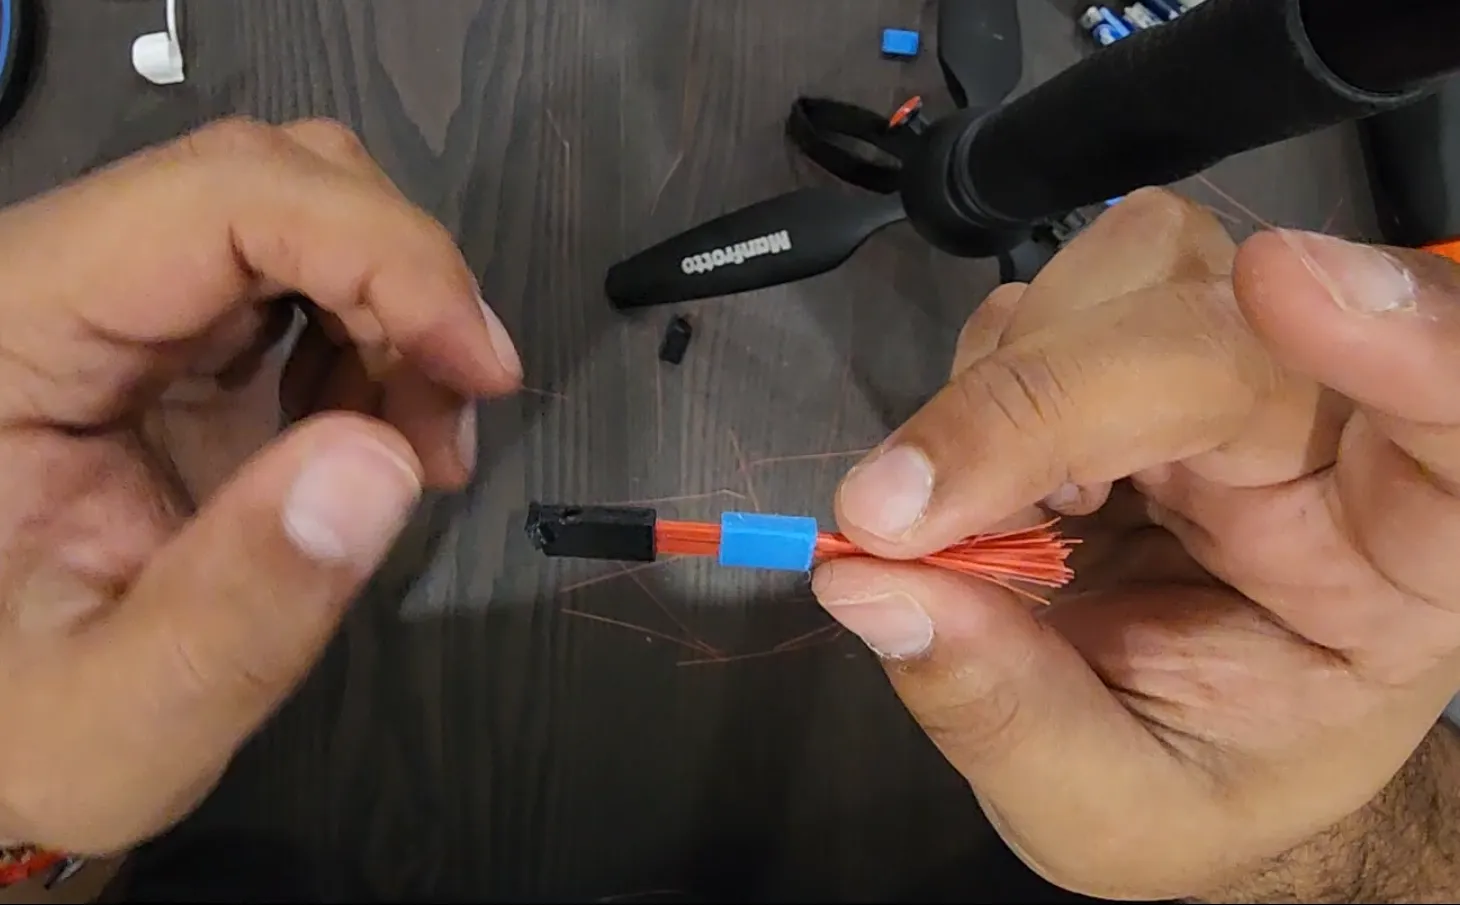
Step 6 - Once your glue has dried (varies depending on the glue used.) Insert the arms into the main brush node, and remove the bristle holder.
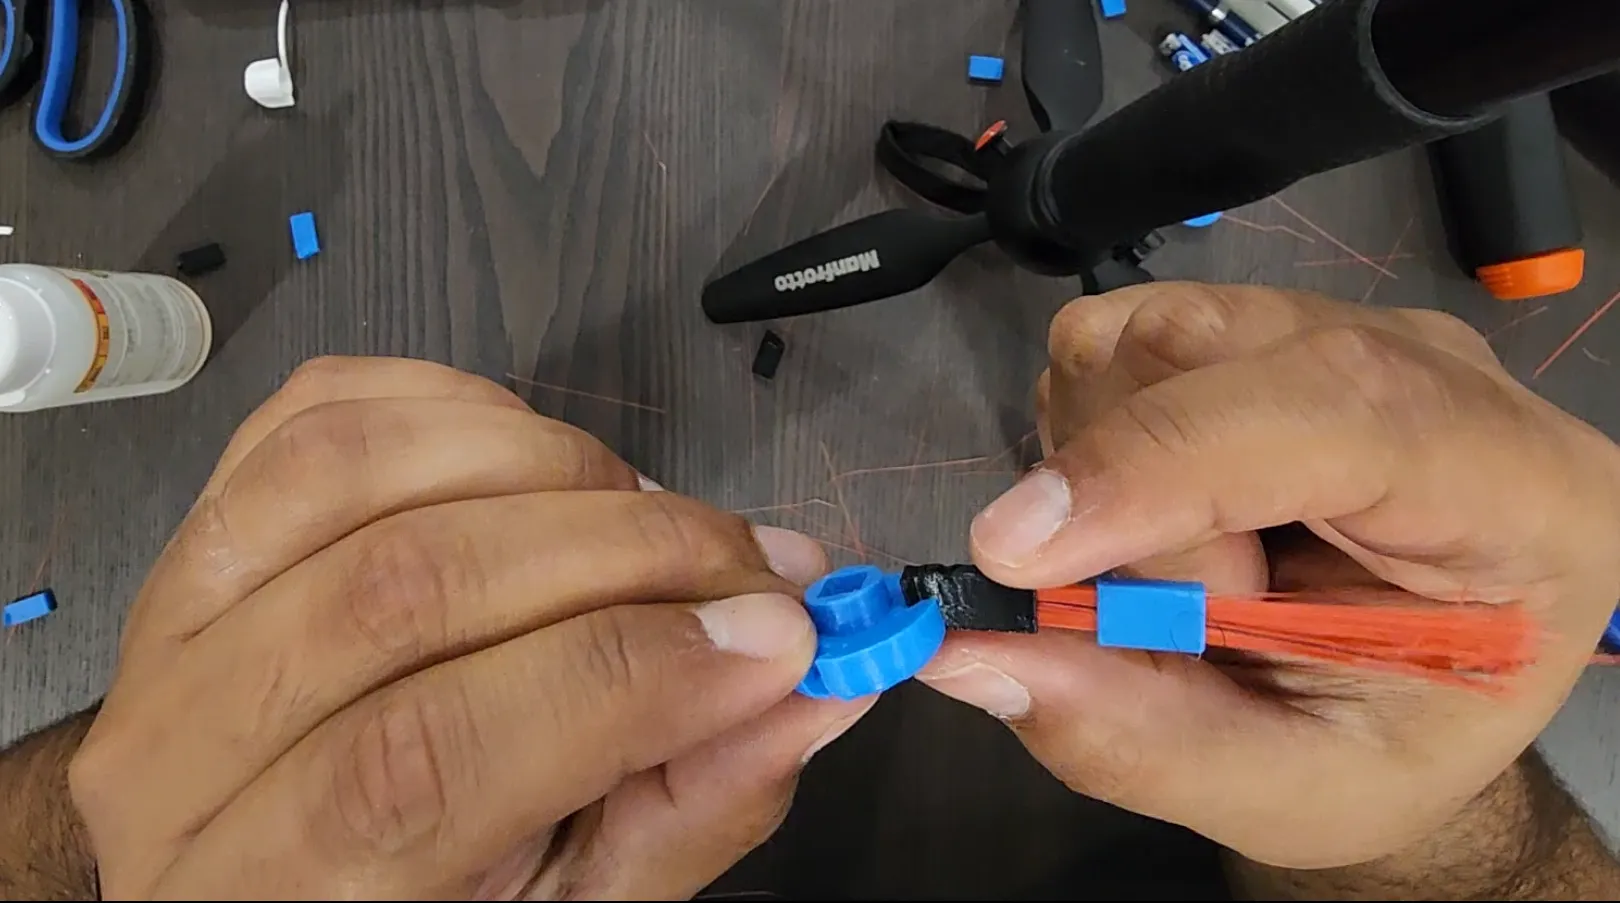
If you complete these steps above, you should have yourself a functional replacement brush for your robot vacuum, so you can breath new life into your robot vacuum instead of having to buy a new one, or find the replacement part via a shady/slow manufacturer site.


Add a commentComments